Muhimbi’s PDF Editor for SharePoint lets you crop PDF pages directly in SharePoint Online or on-premises. Simply select the cropping tool and drag a rectangle around the area you want to crop. Apply the crop to an individual PDF page or crop all the pages in your document.
Step 1: Opening PDF Files in SharePoint
Go to the SharePoint library and click Upload to import a PDF from your computer or select an existing PDF from the library.
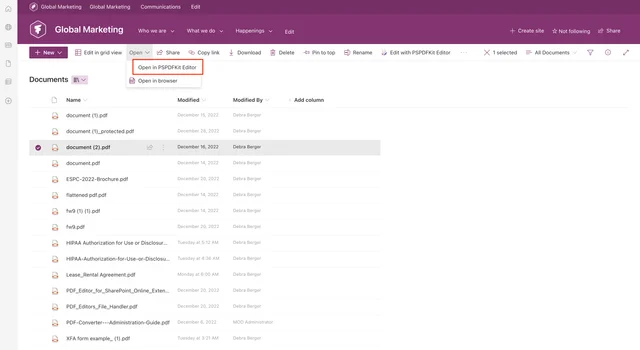
Click Open from the dropdown menu and choose Open in PSPDFKit Editor.
Alternatively, select a PDF from your SharePoint library and choose Edit with PSPDFKit Editor from the toolbar or by right-clicking on the PDF file.
Step 2: Cropping PDF Pages
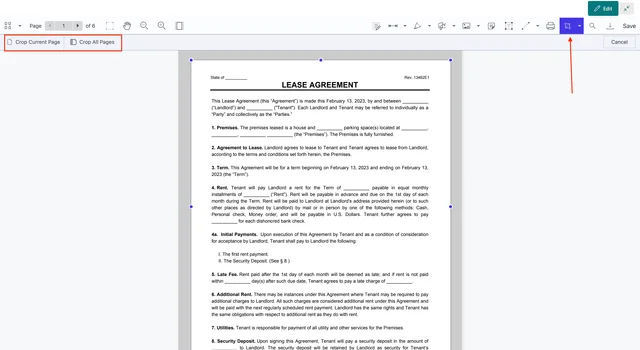
Click the dropdown arrow to the left of the magnifying glass icon in the top-right toolbar and select Document Crop.
You can crop all pages or only the current page. If you want to crop PDF pages individually, scroll down to the page you want to crop or enter the page number in the top-left corner.
Use the left mouse button to select the document area you want to keep. If you’ve made a mistake, click Cancel and try to select the area again. Once you’re satisfied with the selection, click Crop Current Page to crop that individual page.
If you want to crop the entire PDF document, you don’t need to enter the page number. Instead, choose the Document Crop option and select the area you want to keep. The entire document will be cropped to that size. As a final step, click Crop All Pages and save the changes.
Free Trial
Try PDF Editor for SharePoint Online free for 14 days by downloading the app directly from Microsoft App Source. This is a full trial version, without watermarks, but limited in time. There’s an unlimited trial version, where all files are watermarked, and you can choose between three different installations: file handler, web part, or online extension. Refer to the table on the free trial page to learn more.
PDF Editor for SharePoint On-Premises covers all different license types and SharePoint editions (2013–2019 and SE). The detailed installation guide is included in the download. During the free trial, all your documents will be watermarked.