In this guide, you’ll learn how to convert a SharePoint file to PDF using Power Automate and Muhimbi PDF Converter.
Steps to convert your documents to PDF using Power Automate:
- Create a flow in Power Automate
- Define your action
- Create a file
- Publish your workflow
This example uses Power Automate to convert a SharePoint file to PDF in SharePoint. However, you can save your converted PDF file to another destination, like Dropbox, Google Drive, OneDrive, or any platform supported by Power Automate. You can also extend our example by adding additional automation, such as sending the converted PDF as an email.
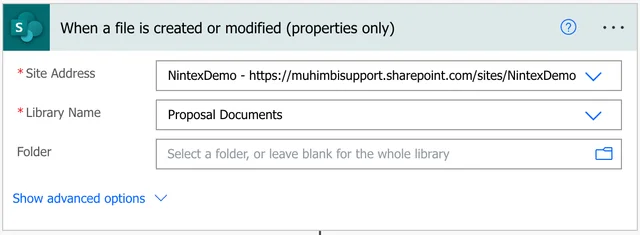
1: Creating a New Flow
Create a new flow and use the When a file is created or modified (properties only) trigger for SharePoint Online. Fill out the URL for the site address, and select the relevant SharePoint library from the dropdown menu.
Add the Get file content action and specify the site address. Click the File Identifier field, and then in the dynamic content search bar, type Identifier.

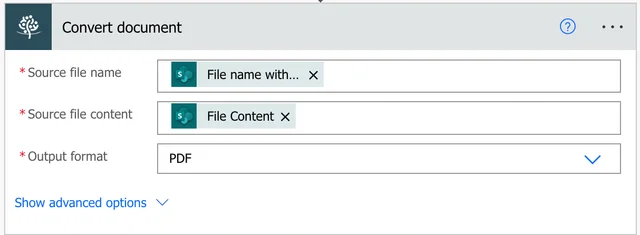
2: Converting to PDF
Insert Muhimbi’s Convert document action and fill it out as shown in the screenshot displayed below. In the Source file name field, enter the dynamic content File name with extension. In the Source file content field, enter File Content.
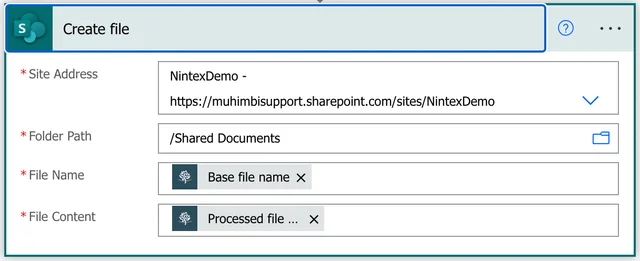
3: Creating a File
Insert the Create file action to write the converted file back to SharePoint Online or your desired destination. Select a folder where you’ll store the converted file, and in the File Name field, choose Base file name. In the File Content field, choose Processed file content from the list of dynamic content on the right.
4: Publishing the Workflow
Publish the workflow and create or update a SharePoint file in the specified list. After a few seconds, the flow will trigger and a PDF file will be generated.
Additional Resources
For more information, refer to the following resources.