Want to see it in action? Contact us to schedule a demo!.
In this guide, you’ll learn how to convert Microsoft forms to Word using Power Automate.
Steps to convert your Microsoft form to Word using Power Automate:
- Create a flow
- Define your action
- Create a file
- Publish your workflow
Microsoft Forms provides a quick and easy way to create surveys and questionnaires to collect responses from different people. Even though this is useful, the completed forms aren't easily portable — i.e. you can't send a form to another person and expect to keep the look and feel of the completed form, along with any files that have been uploaded to it, intact.
Using Power Automate and Muhimbi PDF Converter, you can merge form attachments into a single MS Word document, along with the responses, and then send that document as an email. You can also write the generated document to SharePoint, OneDrive, or anywhere you can send files using Microsoft Power Automate.
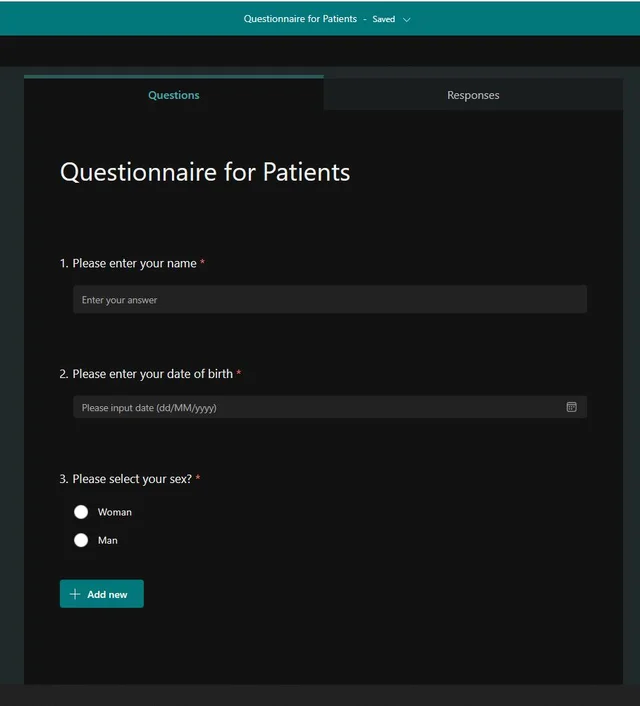
Sample MS Form with Attachment
This example will use the following form.
Prerequisites
Before building the workflow, ensure all prerequisites are in place:
- Knowledge about Microsoft Forms and how to build workflows using Power Automate
- A full, free, or trial subscription to Muhimbi PDF Converter
- Permission to use Power Automate
- Appropriate privileges to create flows
Using Power Automate to Convert Forms with Attachment to MS Word
The image below shows a high-level overview of how to convert forms with attachments to MS Word documents.

1: Creating a Flow
Add the When a new response is submitted trigger action specifying the Form Id of the Microsoft form. It will trigger the flow when a new response is submitted.

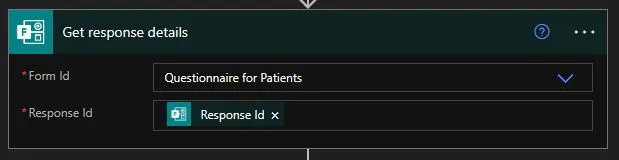
2: Getting the Response Details
Add the Get response details action, specifying the Form Id and Response Id of the Microsoft form. This will trigger the flow when a new response is submitted.
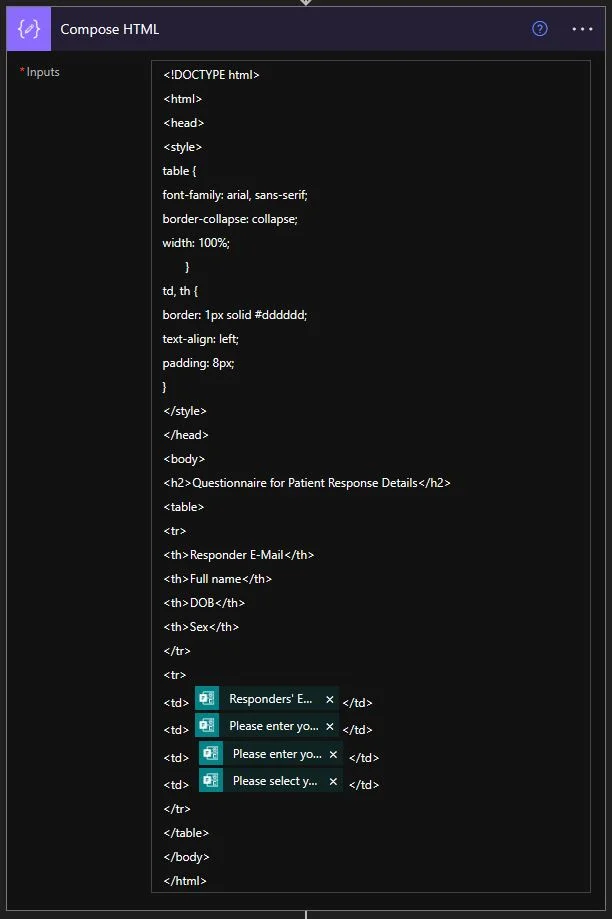
3. Adding the Compose Action
Add the Compose HTML action. You can copy the HTML code fragment provided below into the Inputs field and then insert the various list fields in the appropriate places, just between each line’s <td\</td\elements. Your completed code will look like what you see in the screenshot.
4: Converting to PDF
Convert the form to PDF by adding the Muhimbi Convert document action. In the Source file name field, include a proper name with .html as the extension. In the Source file content field, choose Outputs. In the Output format field, choose DOCX from the dropdown menu. Click Save to save the workflow.

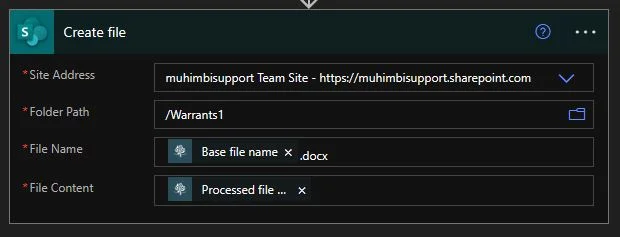
5: Creating a File
Next, add the Create file action. In the Site Address field, choose the correct site address from the dropdown menu. Select the correct Folder Path where the converted Word document file should be created. In the File Name field, give your Word document a meaningful and unique name, and be sure to add the .docx extension after the name.
Click Save to save the workflow.