In this guide, you’ll learn how to OCR and extract text from an image using Power Automate. It makes use of the Muhimbi Extract text using OCR action to extract text from an image-based file and write the extracted text to a SharePoint list column. This example can be used to retrieve invoice numbers or other textual content from documents that conform to a particular template.
Prerequisites
Before building the workflow, ensure all prerequisites are in place. You should have some knowledge of building workflows using Power Automate.
Additionally, you’ll need:
- A full or trial subscription for Muhimbi PDF Converter for Power Automate.
- Appropriate privileges to create flows.
Extracting Text from Images and Scans and Converting to Searchable PDFs Using Power Automate
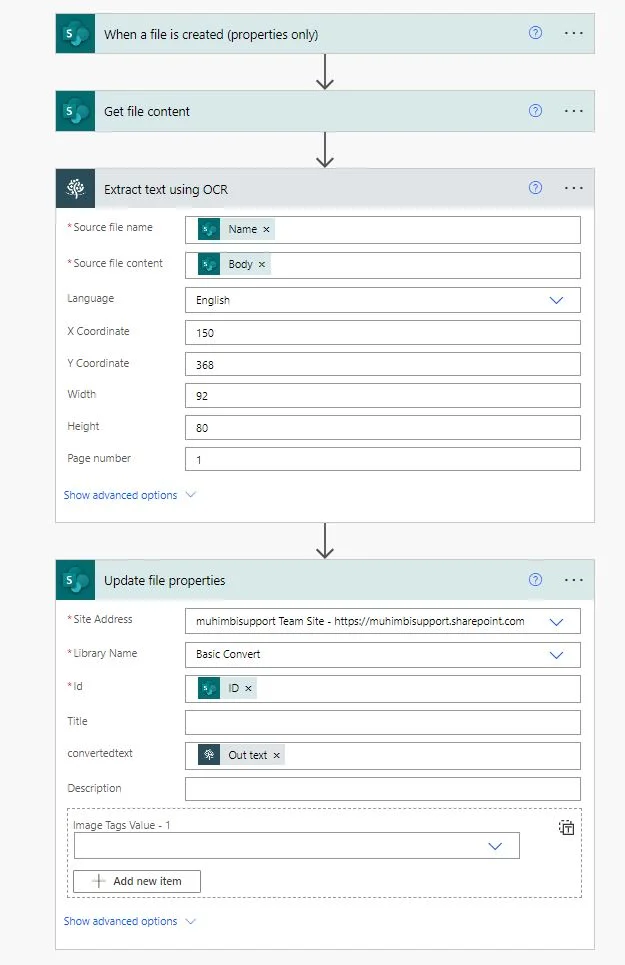
This example shows how to create a Power Automate (Flow) solution to extract text from image-based SharePoint content and update a field with the extracted text. From a high level, the flow will look like what’s shown in the image below.
1: Creating a New Flow
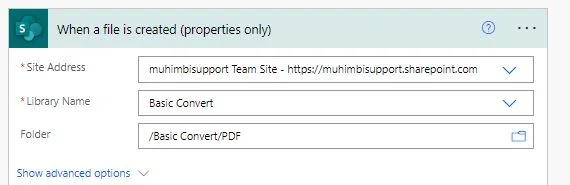
Create a new flow and use the When a file is created (properties only) SharePoint Online trigger. Fill out the Site Address and Folder fields accordingly.
2: Getting the File Content
Insert a Get file content action and fill it out as shown in the screenshot below.
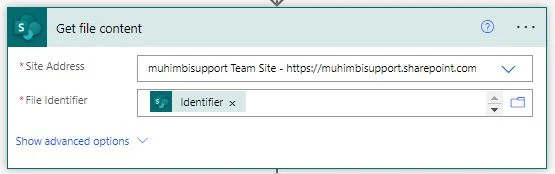
In the Site Address field, specify the same address used in the trigger. In the File Identifier field, choose the Identifier option inside the When a file is created in folder trigger.
3: Extracting Text Using OCR
Insert the Extract text using OCR action and fill it in as shown in the screenshot below.
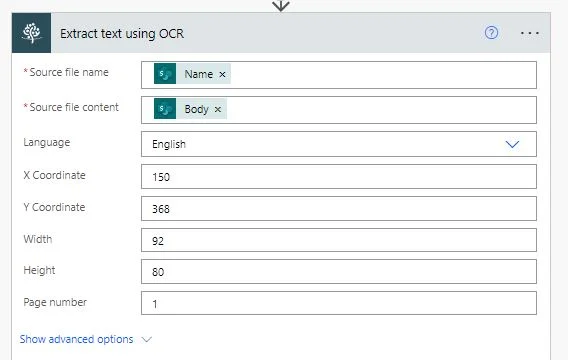
In the Source file name field, select the Name returned by the trigger.
In the Source file content field, select the Body returned by the Get file content action.
In the Language field, set the language the source document is written in. It defaults to English, but there’s support for Arabic, Danish, Dutch, English, Finnish, French, German, Hebrew, Hungarian, Italian, Norwegian, Portuguese, Spanish, and Swedish.
In the X Coordinate, Y Coordinate, Width, and Height fields, specify the exact area to extract text from. The unit of measure (UOM) is 1/72 of an inch.
4: Updating the File Properties
Insert the Update file properties action to write the converted file back to SharePoint Online or your desired destination.
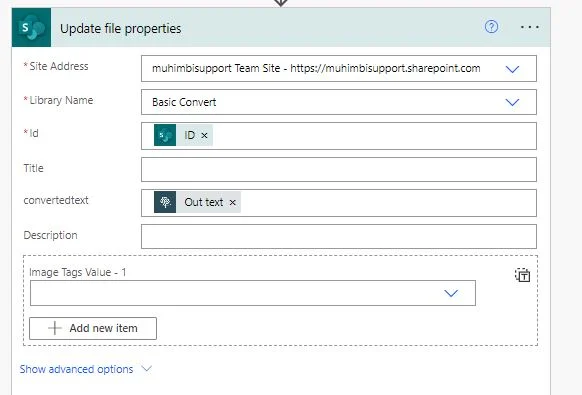
Once the text has been extracted, you’ll want to update a column in the source file. To facilitate this, there’s a column named convertedtext in the library.
- Specify the same site address and library used in the trigger.
- In the Id field, specify the ID returned by the trigger.
- Specify Out text, as returned by the Extract text using OCR action, in the Extract Output field.
5: Publishing the Workflow
Publish the workflow and create a TIFF file in the specified document library. After a few seconds, the flow will trigger, and the convertedtext column in the document library will be updated.