In this guide, you’ll learn how to automatically add a watermark to an MS Word document using Power Automate. You can add text, rectangles, images, PDF files, QR codes, barcodes, and other shapes as watermarks to your Word file.
This specific example adds a text watermark to a DOCX file located in Dropbox and then creates a new version of the watermarked file in another location within Dropbox. You can use this example to watermark other standard MS Office formats like Excel and PowerPoint (see file formats we support).
Additionally, while this example uses Power Automate to watermark a Word file in Dropbox, you can also add watermarks to your file in another destination, like SharePoint, Google Drive, OneDrive, or any platform supported by Power Automate. Customize our example by adding additional automation, like sending a watermarked file via email.
Prerequisites
Before building the workflow, ensure all prerequisites are in place.
- A full or free trial subscription for Muhimbi PDF Converter for Power Automate
- Appropriate privileges to create flows
- A Dropbox account connected with Power Automate
Using Power Automate to Add Text Watermarks to Word Files
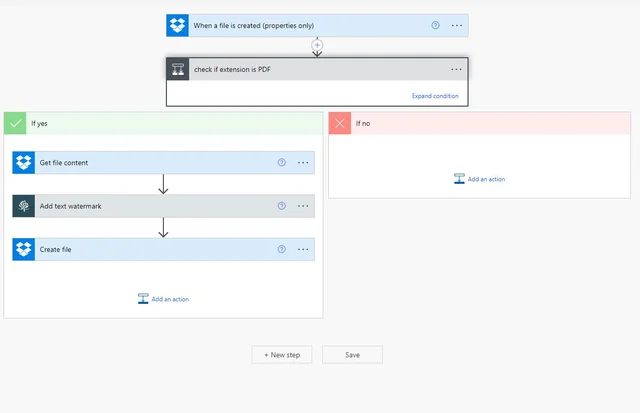
The following image shows a high-level view of how to add text watermarks to Word files with PDF Converter for Power Automate.
Specifying the Folder
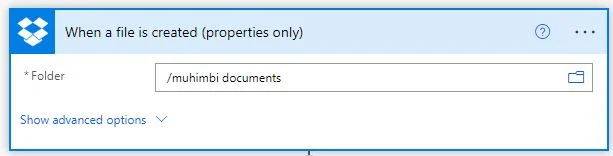
Insert the When a file is created (properties only) flow action for Dropbox, and in the Folder field, specify /muhimbi documents.
Inserting a Condition
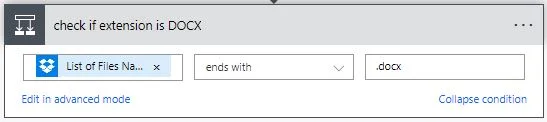
Insert the Condition flow action, and specify List of Files Names, which is the output of the When a file is created (properties only) action. It ends with .docx.
Getting the File Content
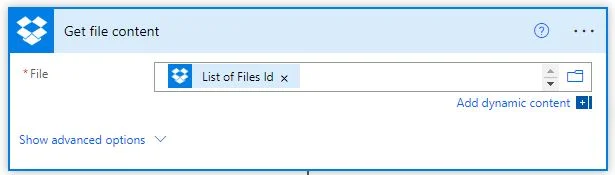
If the step above evaluates to true, add Get file content for the Dropbox action in the If yes box. In the File field, enter List of Files Id, which is the output of the When a file is created (properties only) action.
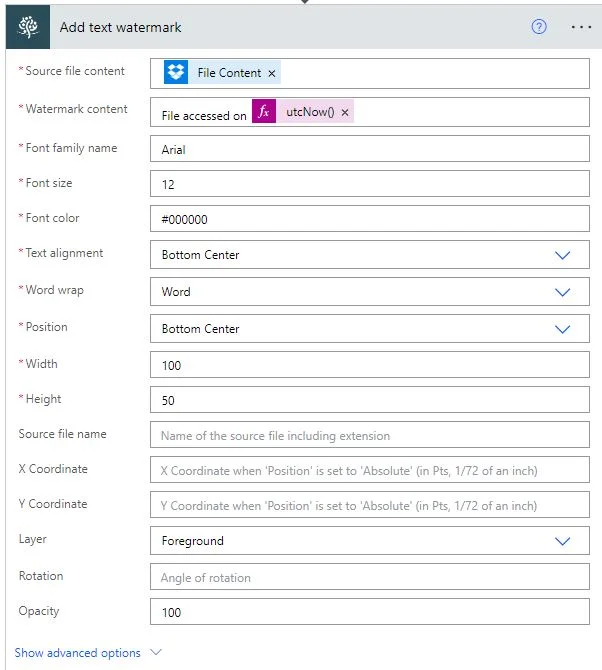
Adding the Text Watermark
Insert the Muhimbi Add text watermark action. This workflow action can be used to apply text to the foreground or background of one or more pages in the document with full control over the font, style, size, and color. The text stored in the content field may contain embedded field codes, such as the date or current page number. Power Automate expressions are also supported, which makes it possible for dynamic information stored in workflow variables or in an item’s columns to be embedded in the watermark.
Add the following mandatory fields to the action:
- Source file content — Specify File Content, which is the output of the Get file content action.
- Watermark content — Enter the text you want to be displayed in your watermark.
- Font size — Enter the watermark font size.
- Font color — Enter the watermark font color.
- Text alignment — Select the text alignment of the watermark.
- Word wrap — Select the word wrap style for the watermark.
- Position — Select the position in the image where you want the watermark to be displayed.
- Width —100
- Height — 50
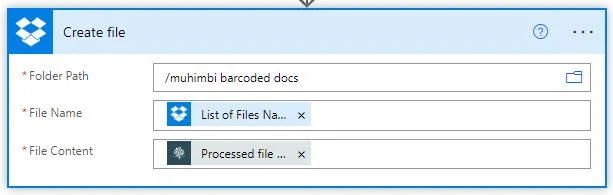
Creating a File
Insert the Dropbox Create file action after the Add text watermark action.
The action has three main parameters:
- Folder Path — The path of your destination folder.
- File Name — List of Files Names, which is the output of the When a file is created (properties only) action.
- File Content — Processed file content, which is the output of the Add text watermark action.
You can test this workflow by uploading an MS Word (.docx) document to the Dropbox location. This will trigger the flow after a minute and create a new document with a watermark.

Additional Resources
For more information, refer to the following resources.