In this guide, you’ll learn how to export a SharePoint page to PDF using Muhimbi PDF Converter. You can also automatically export SharePoint pages to PDF by following our step-by-step instructions using SharePoint Designer workflows or Power Automate.
Exporting to PDF with the SharePoint User Interface
The [Muhimbi PDF Converter for SharePoint Online] pdf converter for sharepoint comes with a feature that converts a webpage to a PDF. This allows SharePoint Online pages such as wikis and list items to be converted to PDFs using the SharePoint UI.
To convert SharePoint Online URLs, the PDF Converter first needs to fetch the page, which requires authentication. As it isn’t possible to automatically take the username and password from the current user, credentials will need to be specified in the workflow action. Alternatively, a more secure option is to enter them on a secure screen that only administrators can access.
The first step is to elevate the Muhimbi app to allow links to be added to the SharePoint UI. To begin the elevation process, you need to have Site Collection Administrator privileges. To do this:
Navigate to the SharePoint admin center (
\[your tenant\]-admin.sharepoint.com), and add/\_layouts/15/appinv.aspxto the end of the URL to access the elevation screen. Remember to use your tenant’s URL.In the App Id field, enter 80645d3a-62a3-4ce3-a224-ce22188d619c and click Lookup.
Don’t change any of the fields, but paste the following XML in the Permission Request XML field:
- Click Create to continue to the next screen. It will look similar to what’s shown below, depending on the level at which elevation is carried out.
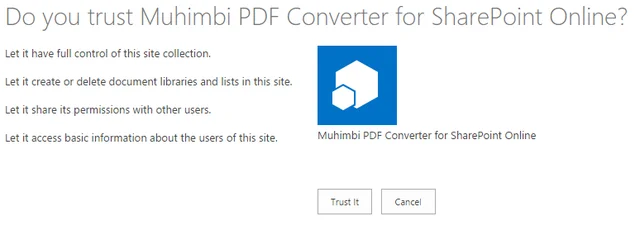
Click Trust It to activate the app’s new privileges across the entire tenant.
Enable the webpage conversion feature by navigating to Site Contents and clicking Muhimbi PDF Converter for SharePoint Online.
Provided you’re registered as a known user, you’ll see a Features option on the left-hand side of the screen. If this option isn’t displayed, refer to the Troubleshooting section at the end of this article.
Click Features Link, which displays the following screen, and then click Activate to elevate the relevant feature.
- Specify the default user credentials for converting SharePoint Online pages. For more information, please refer to SharePoint Online HTML Conversion — User Credentials.
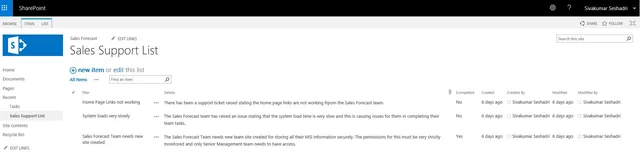
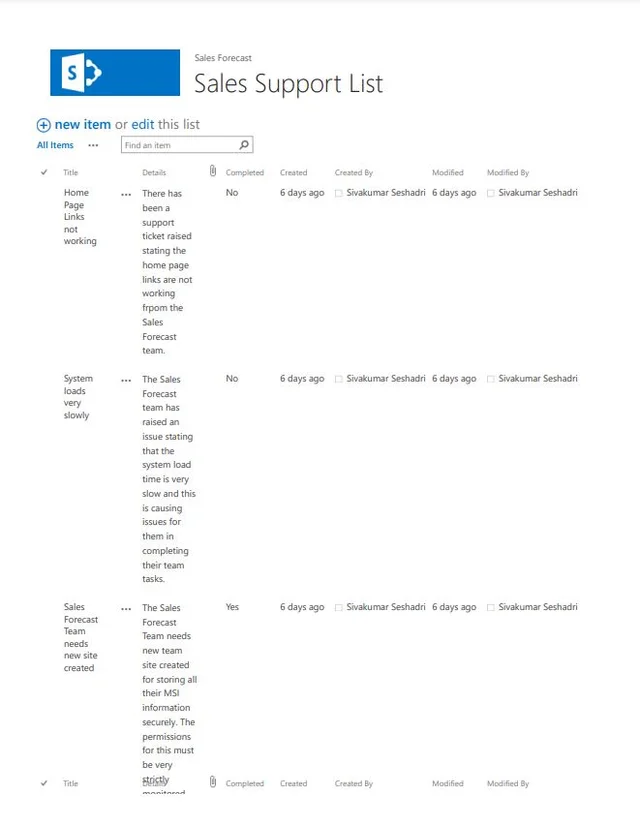
The original list
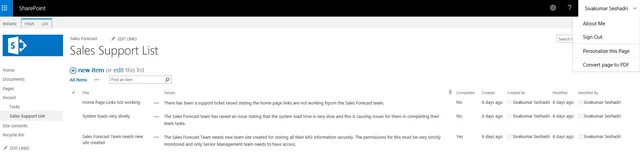
Convert via Personal Actions
Resulting PDF
With everything configured as above, you can navigate to a Classic View of the MS SharePoint Online page. In the Personal Actions menu (the menu that opens when clicking on your name at the top-right corner of the screen), select the Convert page to PDF option.
The exported PDF is automatically optimized for printing. Switch to the Screen media type in the HTML Conversion configuration screen (the same screen used for specifying the default credentials) to view the PDF the same way it’s displayed in the web browser.
Exporting to PDF with MS SharePoint Designer Workflows
Every time a list item is updated, or whenever a list item’s status changes to Approved, a PDF file will need to be created and archived or emailed, or any other action will need to be performed automatically.
The quickest way to automate the process of exporting SharePoint pages to PDF is by creating an MS SharePoint Designer Workflow:
Install and activate the Muhimbi PDF Converter for SharePoint Online Workflow Actions. Make sure to use version 9.10 or later.
Although there’s no need to elevate the Muhimbi App or enable Muhimbi PDF Converter's feature for converting a web page, it may come in handy if you don’t want to store the HTML Conversion credentials inside the workflow itself.
Specify the default credentials, as well as the optional aliases, using Muhimbi’s user credentials feature.
Navigate to the list and use SharePoint’s list ribbon to create a workflow in MS SharePoint Designer. Refer to this video tutorial if you need more help.
Give the workflow a name, set its Start Options, and design the workflow.
Insert the Convert HTML to PDF workflow action and fill in the blanks.
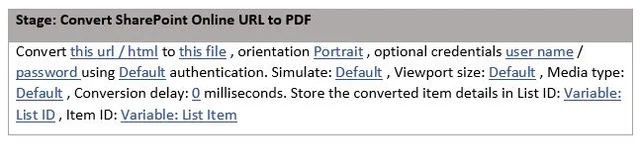
- this url / html — This is the fully qualified URL to convert. In this example, you’ll convert the list Item. Navigate to the View Item URL for the list item, and copy the URL up to and including ?ID=
. This will result in something likehttps://acme.sharepoint.com/sites/somesite/Lists/some_list/DispForm.aspx?ID=`. Select this URL, click the three dots (...) button, and paste the address. Place the cursor at the end of the URL and click Add or Change Lookup. From the Field from source option, select ID to automatically insert the ID of the item being converted. - this file — Specify the location to write the PDF file to, e.g.
Shared Documents/item.pdf. You can make the file name unique by inserting the ID in the same way as described in the previous step. For details about specifying output paths, refer to this blog post. - Orientation — Page orientation of the converted file. Use Portrait or Landscape.
- Credentials — To convert SharePoint Online web pages — not files, as this applies to URLs only — the HTML Converter needs to authenticate during conversion. Specify credentials, or leave them empty to use the default credentials configured centrally. If one or more aliases have been configured, then they can be used by specifying the alias name between curly braces in the username field (e.g. {SomeAliasName}). The password field can be left empty in this case.
- Authentication — Accept the default value for URLs located in SharePoint Online. For external — non-SharePoint — URLs, specify Web (for normal web-based authentication) or anonymous for sites that require no authentication.
- Viewport — Optionally specify a virtual screen resolution to allow responsive web content to output the appropriate version (e.g. mobile or desktop version).
- Media Type — Control if output should be optimized for Print layout (using the Print CSS Media type) or rendered exactly as displayed on the screen.
- Conversion delay — Control the delay between initially loading the page, including JavaScript rendering, and starting the PDF conversion process. Keep this value high, as SharePoint Online pages contain very rich content.
- this url / html — This is the fully qualified URL to convert. In this example, you’ll convert the list Item. Navigate to the View Item URL for the list item, and copy the URL up to and including ?ID=
Finish the workflow, publish it, and start it on a list item of your choice. After a few seconds, you’ll find a PDF in the output folder.
Exporting a SharePoint Page to PDF with Power Automate and Logic Apps
Muhimbi’s PDF Converter for SharePoint Online, along with Microsoft Flow actions, can also support the conversion of MS SharePoint Online pages. The MS SharePoint Designer workflow created in the previous section can easily be recreated in Flow. Here are the steps to export SharePoint pages to PDF with Microsoft Flow:
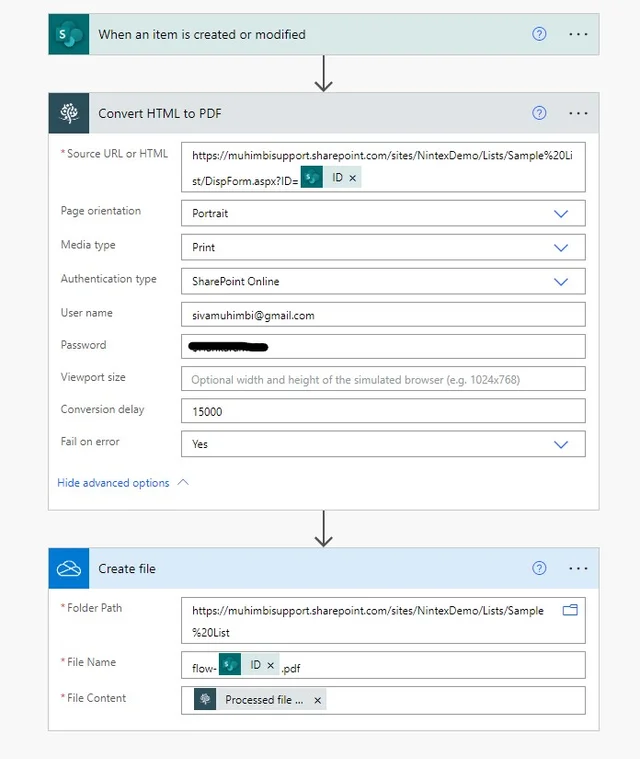
Create a new flow and use the When an item is created or modified SharePoint Online trigger. Fill out the URL for the site collection and select the relevant SharePoint list from the dropdown menu.
Insert Muhimbi’s Convert HTML to PDF action and fill it out as shown in the screenshot below. Substitute the source URL, username, and password. Make sure that, for SharePoint Online conversions, you select Print as the Media type.
Insert a Create file action to write the converted file back to SharePoint Online — or Dropbox, OneDrive, or Google Drive. Alternatively, you can send the PDF via email.
Publish the workflow and create/update a list item in the specified list. After a few seconds, the flow will trigger and a PDF file will be generated.