Muhimbi’s PDF Editor for SharePoint lets you add stamps to a PDF directly in SharePoint Online or on-premises. Select from 25 prebuilt stamps or build a stamp with a custom image, drawing, or text. Drag and drop a stamp to a specific location in your document and adjust its angle, size, or opacity. Dynamically add user names to stamps to help streamline review and approval workflows.
Step 1: Opening a PDF File
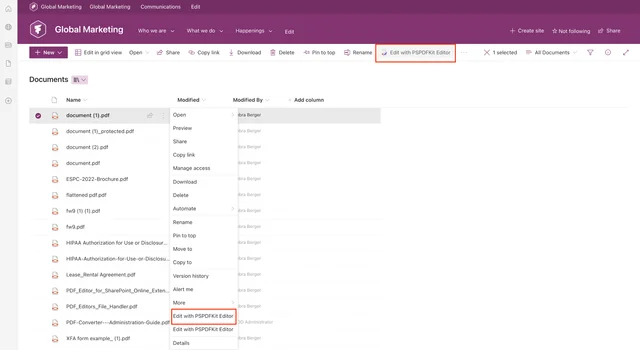
Select a PDF from the SharePoint library and right-click on the three dots menu. Then click Edit with PSPDFKit Editor.
Step 2: Adding a Stamp to a PDF
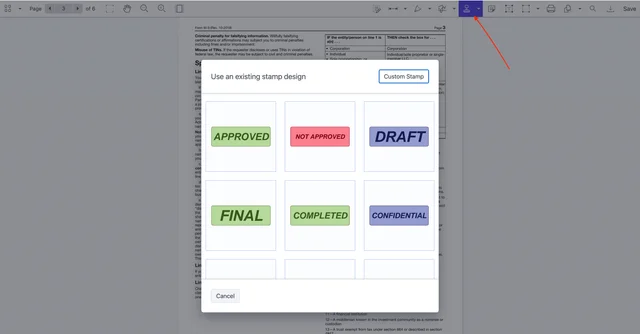
Click the dropdown menu next to the image icon and select Stamp.
Choose from 25 different PDF stamps. The stamp will automatically be placed on the document.
Step 3: Adding a Custom Stamp
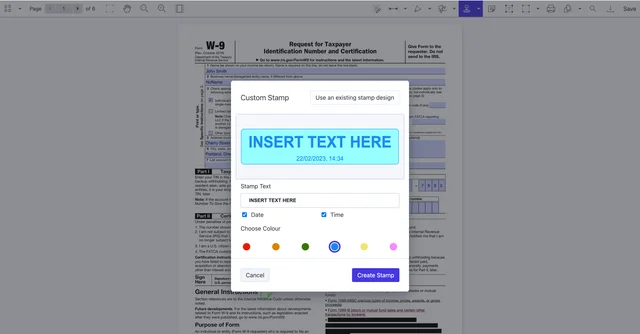
Select Custom Stamp to start customizing a PDF stamp. In the Stamp Text field, you can enter text and untick the boxes if you don’t want to include the time or date on the stamp.
Choose the color of the stamp and click Create Stamp to save your changes.
Step 4: Editing the PDF Stamp
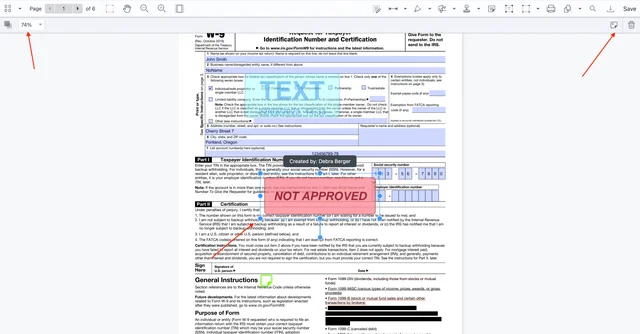
If you want to edit the look of the stamp, select it and then change its opacity by pulling the percentage bar to the left. This additional setting is visible in the top-left corner once you click the PDF stamp.
You can also add a comment to the PDF stamp by selecting the stamp and then clicking the Note icon in the top-right corner.
Next to the Note icon is the Delete button, which can be used to delete the stamp.
You can also change the size and the position of the PDF stamp. Click the border dots and pull them in different directions to resize the stamp. If you want to move the stamp, select it, and once you see a hand palm icon, drag and drop the stamp to a different place on the PDF page. Finally, click Save to save the changes to your PDF document.
Free Trial
Try PDF Editor for SharePoint Online free for 14 days by downloading the app directly from Microsoft App Source. This is a full trial version, without watermarks, but limited in time. There’s an unlimited trial version, where all files are watermarked, and you can choose between three different installations: file handler, web part, or online extension. Refer to the table on the free trial page to learn more.
PDF Editor for SharePoint On-Premises covers all different license types and SharePoint editions (2013–2019 and SE). The detailed installation guide is included in the download. During the free trial, all your documents will be watermarked.