Muhimbi’s PDF Editor for SharePoint lets you add shape annotations to a PDF directly in SharePoint Online or on-premises. Select and drop in a variety of shape annotations to your document. Shapes include ellipses, lines, arrows, rectangles, clouds, and more. Easily customize the size, shape, color, thickness, and opacity of your annotation. Append a user’s name to each shape annotation to identify who added the annotation to your document.
Step 1: Opening a PDF File
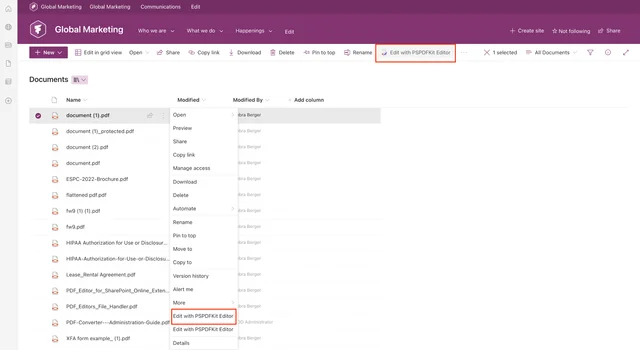
Select a PDF from the SharePoint library and right-click on the three dots menu. Then click Edit with PSPDFKit Editor.
Step 2: Adding Shape Annotations to the PDF
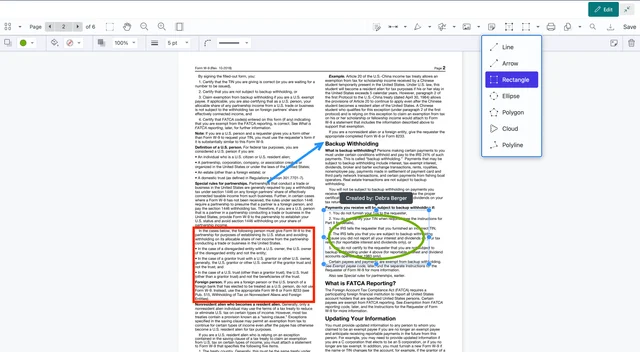
In the toolbar, next to the Text button, there’s a dropdown menu with different shape annotations. Choose your desired shape and drag the cursor in the preferred direction. For example, if you want to draw an ellipse annotation, the moving of your cursor should resemble the look of the ellipse.
You can also draw lines, polylines, arrows, rectangles, clouds, and polygon annotations.
Step 3: Editing Shape Annotations
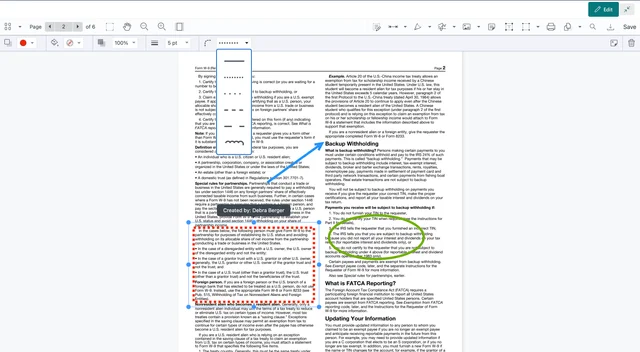
For each type of shape annotation, you can change the color, fill color, opacity, thickness, and line style. There are six different line styles to choose from.
To delete a shape annotation, select it and then click the recycle bin icon in the top-left corner.
Finally, click Save to save the changes to your PDF document.
Free Trial
Try PDF Editor for SharePoint Online free for 14 days by downloading the app directly from Microsoft App Source. This is a full trial version, without watermarks, but limited in time. There’s an unlimited trial version, where all files are watermarked, and you can choose between three different installations: file handler, web part, or online extension. Refer to the table on the free trial page to learn more.
PDF Editor for SharePoint On-Premises covers all different license types and SharePoint editions (2013–2019 and SE). The detailed installation guide is included in the download. During the free trial, all your documents will be watermarked.