Muhimbi’s PDF Editor for SharePoint lets you create a PDF form directly in SharePoint Online and on-premises. Launch the PDF Form Creator tool to start adding text fields, radio buttons, checkboxes, and signature fields to your document. Customize the fonts, border style, background color, and more.
Step 1: Opening a PDF File
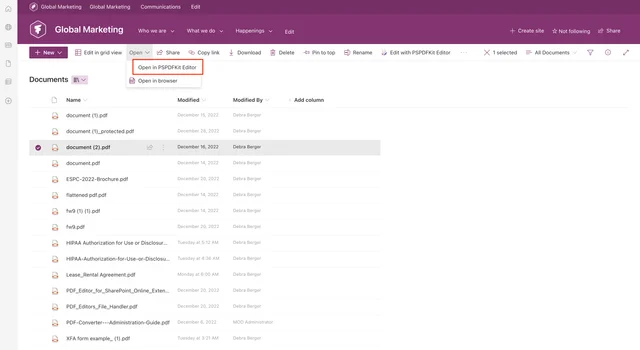
Go to the SharePoint library and click Upload to import a PDF from your computer, or select an existing PDF from the library.
Click Open from the dropdown menu and choose Open in PSPDFKit Editor.
Step 2: Creating Form Fields
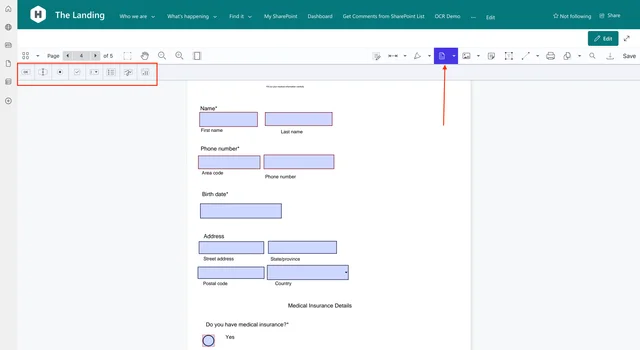
To the right of the Sign button, access the Form Creator from the dropdown menu.
In the top-left corner, you'll see a range of options to choose from. You can create:
- Button widgets
- Text widgets
- Radio widgets
- Checkbox widgets
- Combo box widgets
- List box widgets
- Signature widgets
- Date widgets
Once you choose a widget — for example, a combo box — it'll be shown in the document. You can resize it or move it to a different place in the document. The process is the same for all widgets.
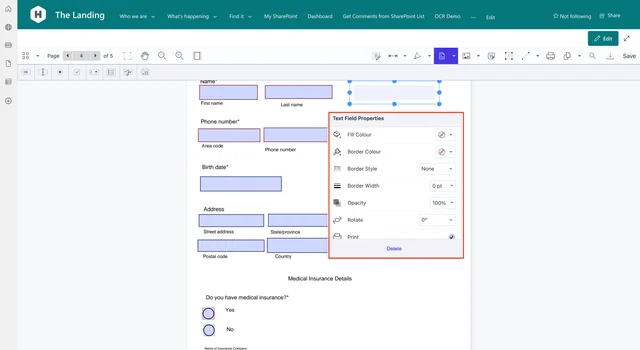
Step 3: Customizing Form Fields
After you decide on the widget's position and size, go through the options shown in the small pop-up window.
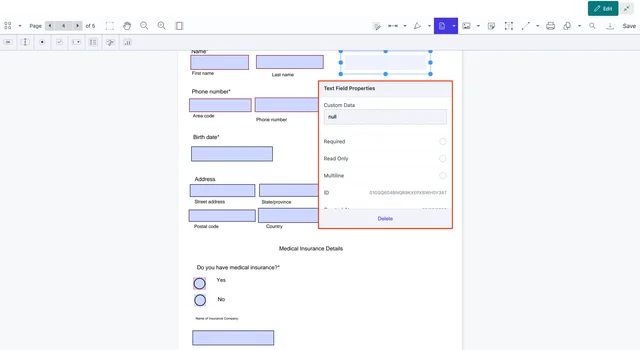
All widgets have advanced options that allow you to mark a field as required, to enter the creator name and note, or to make the field read-only or a multi-select option.
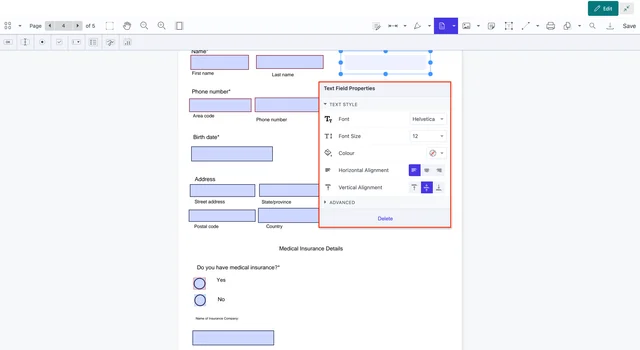
All widgets also have field style and text style settings that you can use to change the color of the fields, opacity, text font type, size, color, and more.
There are some options that are specific to the type of widget:
- In the date widget, you can choose the date format.
- In the list box and combo box widgets, you need to add descriptions for each option.
- In the checkbox and radio button widgets, there are fields for the labels and values.
When you finish creating form fields in your PDF document, click Save, or export the document to your computer.
Free Trial
Try PDF Editor for SharePoint Online free for 14 days by downloading the app directly from Microsoft App Source. This is a full trial version, without watermarks, but limited in time. There’s an unlimited trial version, where all files are watermarked, and you can choose between three different installations: file handler, web part, or online extension. Refer to the table on the free trial page to learn more.
PDF Editor for SharePoint On-Premises covers all different license types and SharePoint editions (2013–2019 and SE). The detailed installation guide is included in the download. During the free trial, all your documents will be watermarked.