We recently released the Muhimbi PDF Converter Xtension for Nintex Automation Cloud. You can download it here or learn more about available Muhimbi deployments for Nintex on our product page.
Nintex Forms provides a quick and easy way to create surveys, questionnaires, and more to collect responses from different people.
However, the completed forms aren’t easily portable, i.e. you can’t send a form and guarantee the “look and feel” remains the same.
In this guide, you’ll learn how to create a simple list containing a Nintex form and then associate Power Automate to convert the form to a PDF once the form is submitted. Then, you’ll learn how to batch-print those documents.
How to Create a Nintex Form
You can create a sample Nintex form by performing the following steps:
Navigate to your MS SharePoint site collection, create a new custom list, and name it Nintex Form Demo.
Once the list has been created, add a few columns based on your requirements.
Once the list has been configured, navigate to the list and click the Nintex Forms icon.
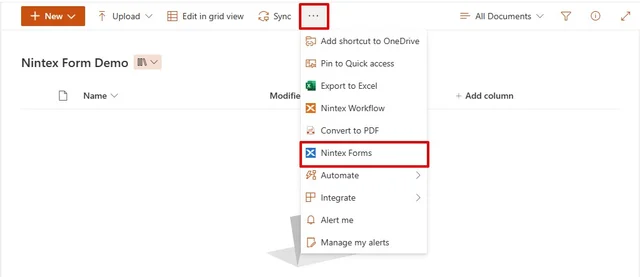
Click OK for the popup. The Nintex Form Demo opens in Nintex Forms.
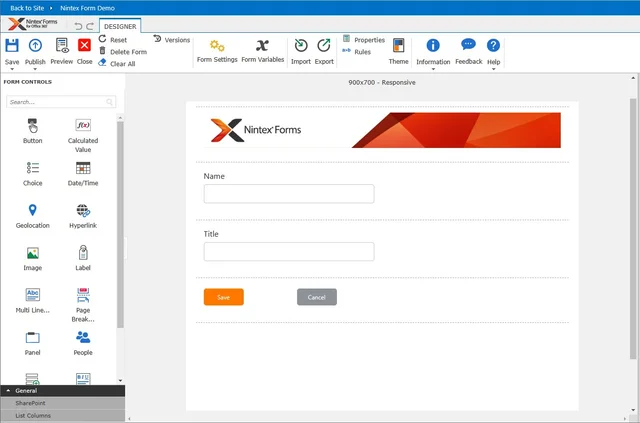
Note: In the page configuration section, the Save button has been automatically added to the form, and it'll work right out of the box.
Click Publish, and your form will be ready to be used in the MS SharePoint list.
Prerequisites
First, ensure all prerequisites are in place:
- A full or free trial subscription of Muhimbi PDF Converter for Power Automate.
- Appropriate privileges to create Power Automate flows.
- Working knowledge of both Nintex Forms and Power Automate.
- Access to a high-speed printer to print large volumes of documents quickly.
Using Power Automate to Convert Nintex Forms to PDF
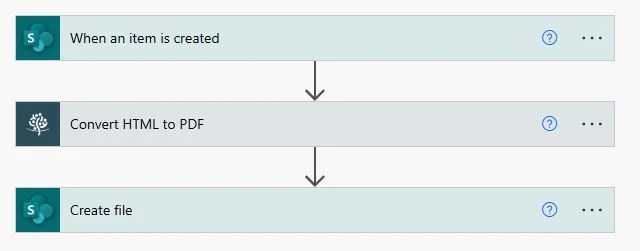
On a high level, the workflow will look like what’s shown below.
To start building your flow, follow the steps outlined below.
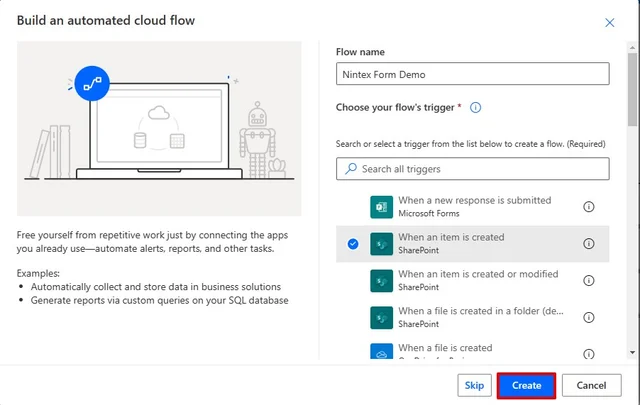
Log in to Microsoft Flow and select the My Flows tab. Navigate to New Flow > Automated cloud flow.

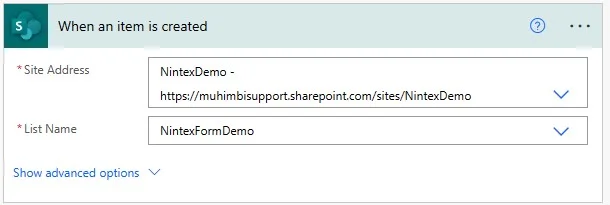
Enter a meaningful name for the flow, select the When an item is created MS SharePoint trigger, and click Create.
In the trigger, specify the path to the SharePoint Online list to monitor the new list item.
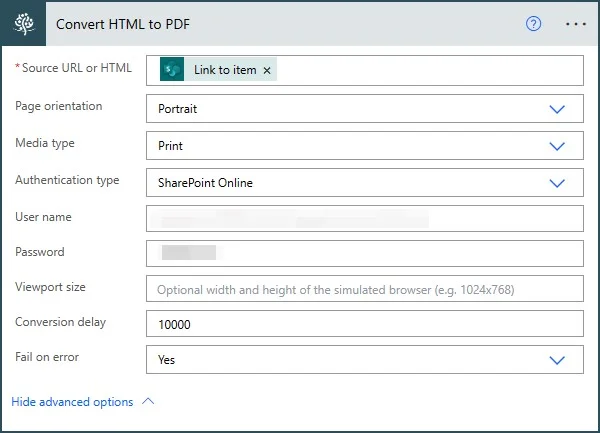
Add the Muhimbi Convert HTML to PDF action to the flow canvas and configure it with the details below.
In the Source URL or HTML field, navigate to the Add Dynamic Content line and choose Link to item from the Get file properties action.
In the Page orientation field, select the appropriate option. Depending on the content and layout of the page, Portrait may be best.
In the Media type field, select the Print option from the dropdown menu. This automatically helps strip out most of the MS SharePoint user interface.
In the Authentication type field, select SharePoint Online from the dropdown menu.
You’ll need to enter the correct User name and Password to be authenticated with the SharePoint Online authentication that you selected in the authentication field above.
In the Conversion delay field, enter a delay of 10,000 (in milliseconds, so 10 seconds). This delay will give the page time to load before it’s converted.
Note: To pass credentials directly in the Power Automate action and in plain text without disclosing the credentials, you can create a Secret in Azure and pass it along.
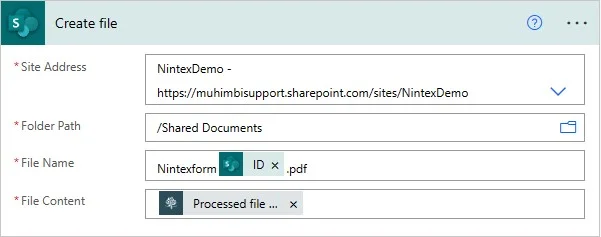
- Add the MS SharePoint Create File action to the flow canvas and configure it with the details below:
- In the Site Address field, choose the correct site address from the dropdown menu.
- Select the correct Folder Path where the converted PDF should be created.
- Give a meaningful File Name to the created PDF, but make sure you remember to add the
.pdfextension after the file name and to make the file name unique, or multiple runs of the flow will overwrite the same file. - Select the Processed file content option to populate the File Content field.
With everything in place, create a list item, and after a few seconds, a PDF will be placed in the output folder.
Periodically copy a batch of converted PDF files from SharePoint to your local drive using the Library’s Actions / Open with Windows Explorer menu.
Select the batch of PDF files on your local system, right-click one of the files, and select the Print option.