In this guide, you’ll learn how to fill a PDF form using Power Automate.
Muhimbi’s import PDF form data action allows you to import XML, FDF, and XFDF data to PDF forms. In this example, you’ll retrieve XML data from an MS SharePoint list and fill out a PDF form with Power Automate.
Prerequisites
Before beginning, ensure all prerequisites are in place:
- A full or free trial subscription of Muhimbi PDF Converter for Power Automate.
- Appropriate privileges to create Power Automate flows.
- Working knowledge of Power Automate.
- An MS SharePoint list with data ready for import.
Filling a PDF Form with Microsoft Power Automate
In this example, you’ll take your MS SharePoint list with data, loop through all the list items, and import the data to a PDF form template. The form will be editable after the data is imported.
Use the form sample, which can be downloaded here.
Creating the Form Structure as XML
To create the form structure as XML, upload your form to the SharePoint library and create a flow in Power Automate by choosing the option to manually trigger a flow.
Then, add the Get file content using path action. Select the site collection, library, and file.
Use the Muhimbi Export PDF Forms Data action, and export the fields of the form as an XML. They can also be exported as XFDF or FDF.
Log the exported data by adding the Compose action and Base64 function.
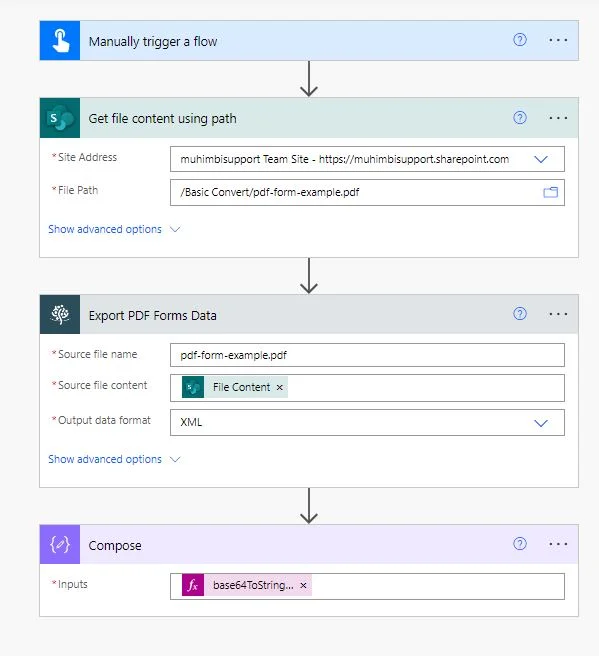
Note: The Muhimbi Processed file content returns a Base64 value. Use the base64ToString(outputs(‘Export_PDF_Forms_Data’)?\[‘body/processed_file_content’\ formula to convert it to a string.
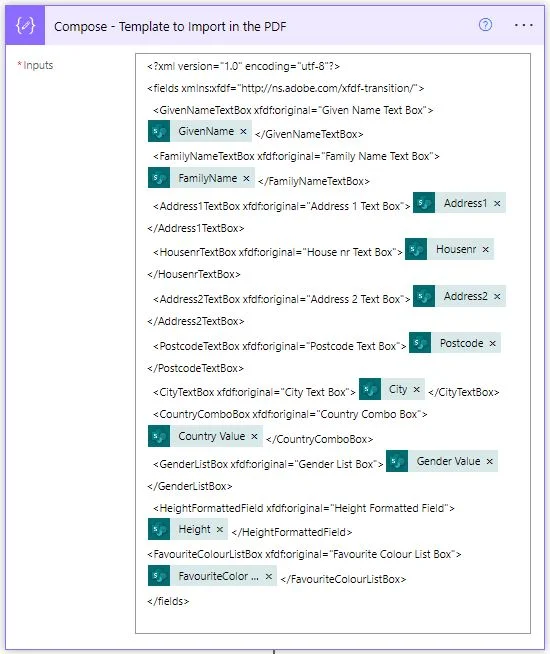
The XML will look as follows:
Now that you have the template as an XML file, you’ll create a Power Automate flow to import the SharePoint list item to a PDF template.
Creating the Power Automate Flow
From a high level, your flow will look like what’s shown below.

Create a new flow using the Instant cloud flow option and use the Manually trigger a flow trigger.
Add the SharePoint Get items action to the flow canvas, and configure it according to the following:
- Site Address — Specify the path to the SharePoint Online site collection that holds the file.
- List Name — Select the SharePoint list you want to get the items from.

Note: If you have a large list, you might need to configure the settings and turn on the pagination option and set the threshold to a site collection.
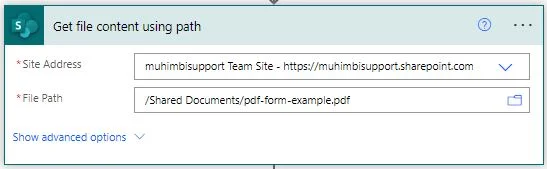
Add the SharePoint Get file content using path action to the flow canvas and configure it accordingly:
- Site Address — Specify the path to the SharePoint Online site collection that holds the form template.
** File Path — Select the file path to your PDF form template.
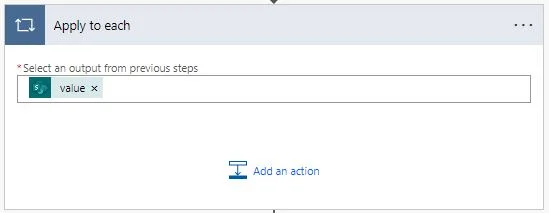
Insert an Apply to each condition and configure it according to the details below:
- Select an output from previous steps — Select the value output from the Get items action.
Inside the Apply to each action, choose Add an action and paste in the XML template you exported before.
Note: Ensure you insert the various list fields from the Get items action in the appropriate places between the \>\< element in the XML pasted here.
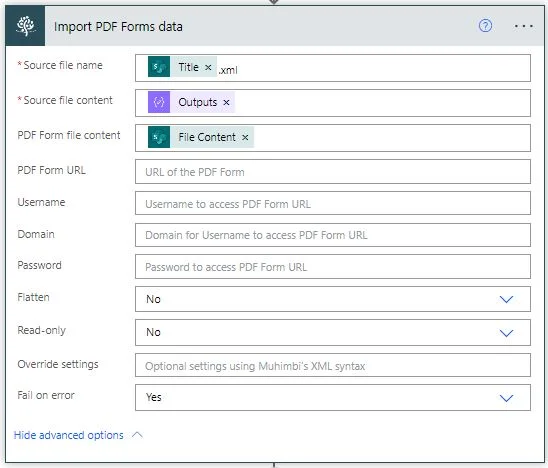
Inside the Apply to each loop, add the Muhimbi Import PDF Forms data action to the flow canvas and configure it as follows:
- Source file name ¸—
Title.xml, which is the output of the Get items action. - Source file content — Outputs, which is the output of the Compose action.
- PDF Form file content — Select File Content, which is the output of the Get file content using path action.
- Flatten — Select No, as you need the form to be editable.
- Read-Only — Set this field to No.
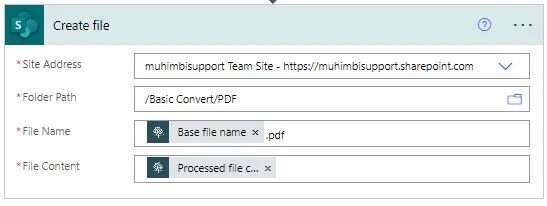
Inside the Apply to each action, add the Create file SharePoint action to create the PDF document in the SharePoint document library. Configure this action as shown below:
- Folder Path — Specify the output path to write the PDF file to.
- File Name — Specify
Base File Name.pdf, which is the output variable of the Import PDF Forms data action. - File Content — Enter Processed file content, which is the output variable of the Import PDF Forms data action.
Start your flow manually, and you’ll notice that after a few seconds, each list item from the SharePoint list will be imported into a template, and PDF documents will be created in the destination library.