In this guide, you’ll learn how to automatically apply security settings to a PDF using Power Automate. With Muhimbi PDF Converter, you can create flows that automatically add password protection, disable printing, and prevent text copying in your PDF documents.
Key security features include the ability to:
- Apply security to MS Word, MS Excel, MS PowerPoint, and PDF files.
- Apply security after user-specific watermarks have been applied.
- Include passwords for opening files or for owners.
- Prevent printing, copying text, and document assembly.
This example uses Power Automate to secure a PDF in SharePoint. However, you can easily add security to your PDF files in another destination, like Dropbox, Google Drive, OneDrive, or any platform supported by Power Automate. You can also extend this example by adding additional automation, such as sending the secure PDF as an email.
Prerequisites
Ensure the following prerequisites are in place:
- An Office 365 subscription with a SharePoint Online license.
- A full subscription to Muhimbi PDF Converter for Power Automate. Note that the free version doesn't support this functionality.
- Appropriate privileges to create flows.
- Working knowledge of SharePoint Online and Microsoft Power Automate (Flow).
Securing Documents Using Power Automate
This example is merely a snippet of how to use this feature. When implementing it in your live environment, ensure the necessary additional columns and steps are added to prevent the flow from recursively triggering.
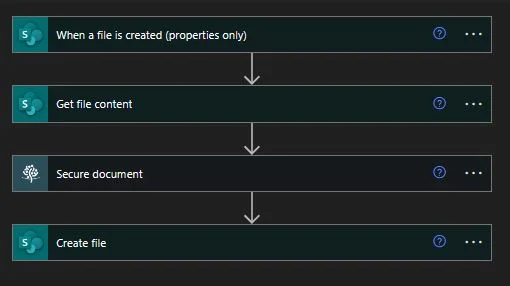
From a high level, the flow will look as shown in the following image.
Creating a New Flow
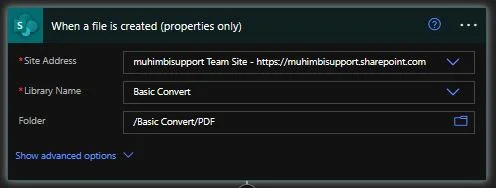
Create a new flow and use the When a file is created (properties only) SharePoint Online trigger. In the Site Address field, add the URL, and in the Library Name and Folder fields, choose the relevant options.
Getting the File Content
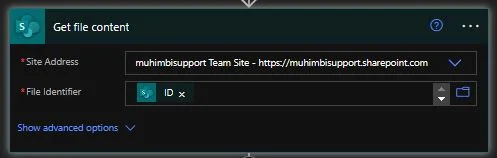
Insert a Get file content action to get the details of the file. Select the URL for the Site Address field, and for the File Identifier field, select the ID, which is the output of the When a file is created (properties only) trigger.
Securing the Document
Insert Muhimbi's Secure document action and fill it out as follows:
- Source file content — Add File Content to the output of the Get file content SharePoint action.
- Source file name — Add File Name with Extension to the output of the When a file is created or modified (properties only) SharePoint action.
- Open password — An optional password that the user must enter to open the document. Please note that any password entered here is displayed in clear text to allow Power Automate action field references to be added.
- Owner password — An optional password that the user must enter to change PDF restrictions. When specifying any PDF restrictions, this password must be set. Please note that any password entered here is displayed in clear text to allow Power Automate action references to be added. The restrictions to apply to the PDF file are separated by a pipe character, |. By default, it applies all restrictions — e.g.
Print|HighResolutionPrint|ContentCopy|Annotations|FormFields|ContentAccessibility|DocumentAssembly— but any combination is allowed. Enter the word Nothing to avoid applying any restrictions. To activate these settings, you must supply an owner password.
Creating the File
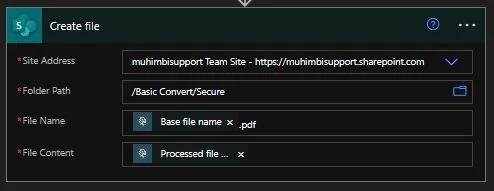
Insert a Create file action to write the file generated by the Secure document action back to MS SharePoint Online. Select the URL for the Site Address field, and select the relevant Folder Path where you want the secure document to be saved. For the File Name field, select Base file name, and for the File Content field, select Processed file content — both of which are the output of the Secure document action.
Publishing the Workflow
Publish the workflow and upload a PDF file in the source library. After a few seconds, the flow will trigger and a secure PDF file will be generated in the target library.
Additional Resources
For more information, refer to the following resources.