


PDF Converter for Power Automate has various actions that enable you to automate your document management workflows. This blog will show you how to fill out PDF forms using SharePoint list data and Muhimbi’s Import PDF Forms data action in Power Automate. In addition to your free, full, or trial subscription, you also need a Power Automate account and appropriate privileges to create flows.
With Muhimbi’s Import PDF Forms data action, you can import XML, FDF, and XFDF data in PDF forms. In this example, you’ll learn how to import XML data into a PDF form. Follow the steps below to see how to import all list items from a SharePoint list and import that data in a PDF form template.
Creating a Power Automate Flow to Export PDF Form Data as XML
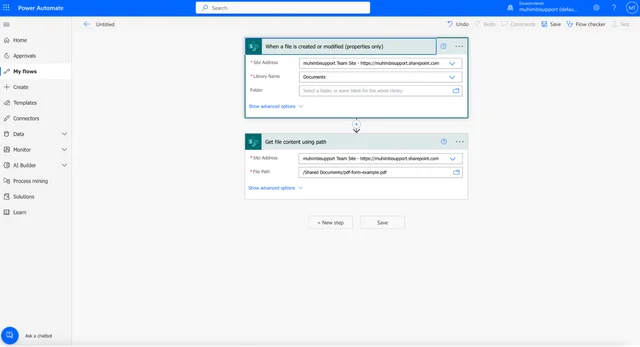
- Select the When a file is created or modified (properties only) trigger. Fill in the Site Address and Library Name fields.
- From the list of actions, choose Get file content using path.
- Fill in the Site Address and File Path fields.
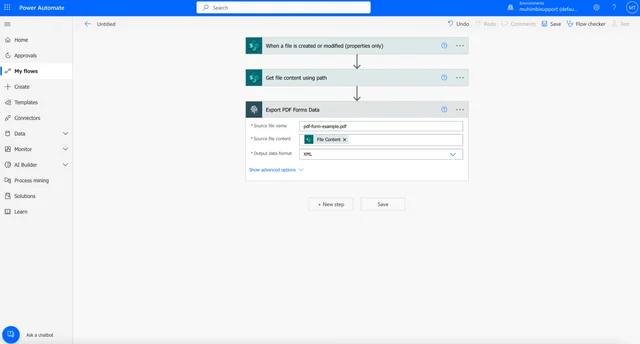
- Search for the Muhimbi connector and select the Export PDF Forms Data action.
- Enter a source file name, and in the source file content field, from the list of dynamic content, choose File Content.
- The output data format should be XML.
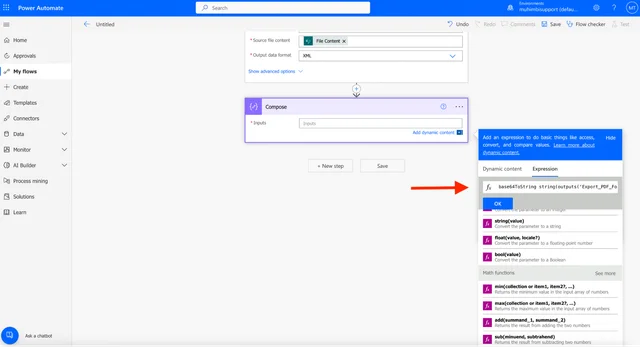
Note: Muhimbi’s Processed file content returns a Base64 string, and you need to use the following formula to convert it:
base64ToString(outputs('Export_PDF_Forms_Data')?['body/processed_file_content'])
Now that you have the template as an XML file, the next step is to create a Power Automate flow to import the SharePoint list item to a PDF template.
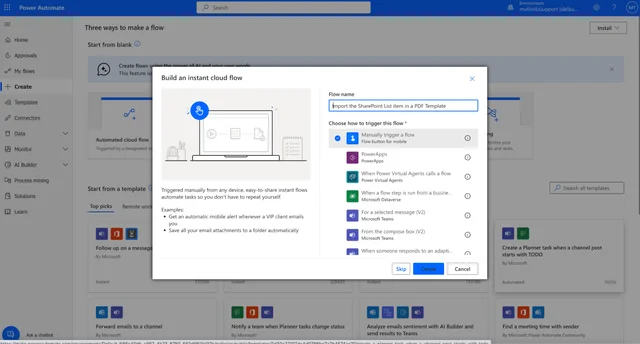
How to Import the SharePoint List Item to a PDF Template
- Create a new flow using the Build an instant cloud flow option and select the Manually trigger a flow trigger.
- Add the SharePoint Get items action to the flow canvas and configure it using the details below:
- Site Address — Specify the path to the SharePoint Online site collection that holds the file.
- List Name — Select the SharePoint list from which you want to get the items.
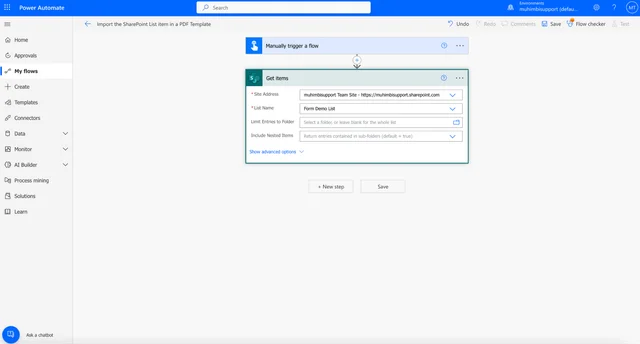
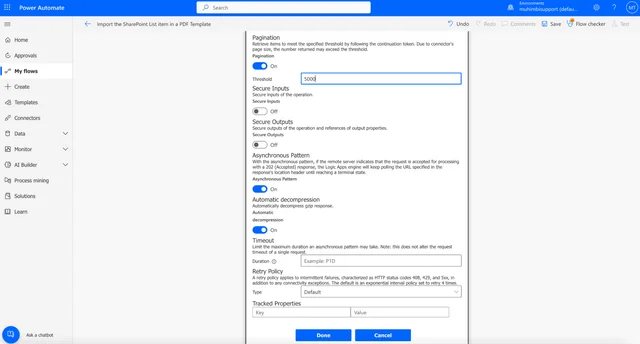
Note: If you have an extensive list, you might need to configure the action settings and turn the Pagination option to On and set the Threshold field to a site collection.
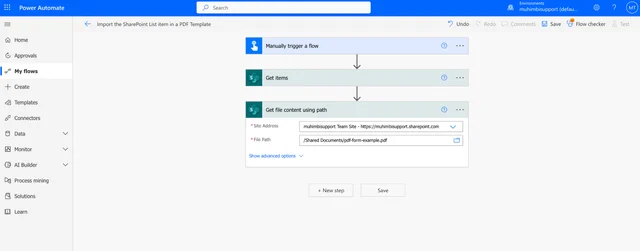
- Add the SharePoint Get file content using path action to the flow canvas and configure it according to the details below:
- Site Address — Specify the path to the SharePoint Online site collection that holds the form template.
- File Path — Select the file path to your PDF form template.
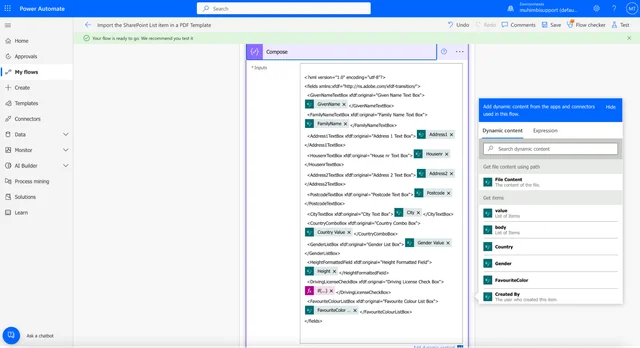
- Add the Compose action to the flow canvas. Then:
Paste the XML template you exported in the Creating a Power Automate Flow to Export PDF Form Data as XML section above.
Insert the various list fields from the Get items action in the appropriate places between the >< elements in the XML.
If you have a Yes/No column in SharePoint, this will return True/False. If you want to change it into a checkbox field, you’ll need to convert it using the following formula:
if(equals(items('Apply_to_each')?['Your Field Internal Name'],True),'Yes','No')
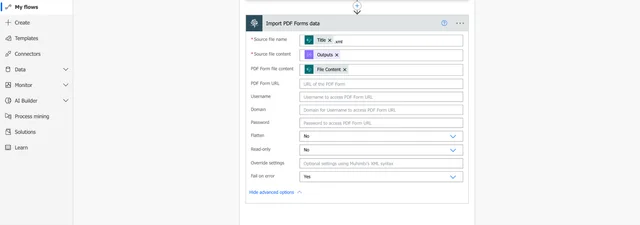
- Click Add an action and add the Muhimbi Import PDF Forms data action to the flow canvas. Then fill in the following details:
- Source file name — Title.xml is the output of the Get items action.
- Source file content — Outputs is the output of the Compose action.
- PDF Form file content — File Content is the output of the Get file content using path action.
- Flatten — Change from Default to No to ensure the form is editable.
- Read-only — Change from Default to No.
You can find the full details for the Import PDF Forms data action on the corresponding page. Or, refer to the Fill PDF Forms Using Power Automate guide and video tutorial.
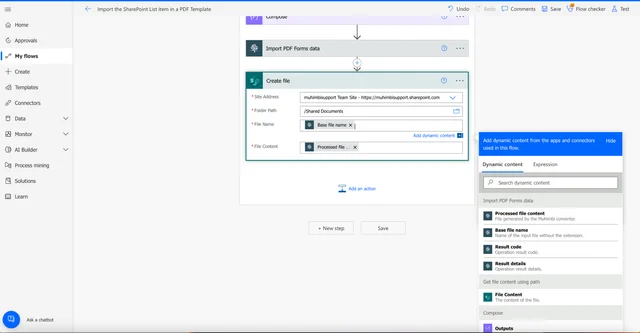
- Click Add an action, and add the Create file SharePoint action to create the PDF document in the SharePoint document library. This is the information you need to fill in the action fields:
- Folder Path — Specify the output path to write the PDF file to.
- File Name — Base file name.pdf is the output variable of the Import PDF Forms data action.
- File Content — Processed file content is the output variable of the Import PDFs Form data action.
Now, start your flow manually, and after a few seconds, each list item from the SharePoint list will be imported into a template and all PDF forms will be generated in the destination library.
Labels: Articles, Flow, PDF, SharePoint Online