OCR analyzes image-based content, e.g. a scanned PDF or an image embedded in an MS Word file, applies some image recognition logic, and then embeds the result in a PDF. The scanned content still looks the same, but you can now copy text from the document, and search crawlers can index this text as well. Muhimbi PDF Converter for Power Automate can convert scans and images to editable and searchable PDFs.
Using Power Automate to OCR an Image
This example takes you through extracting text from an image (.png) file and updating the extracted text to an MS SharePoint library in a custom column created for this purpose. From a high-level perspective, the steps are as follows:
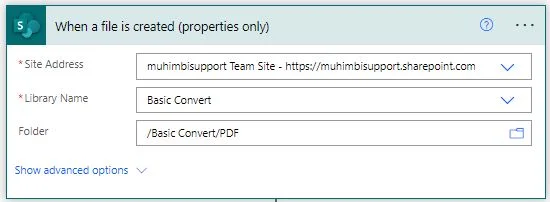
Create a new flow and use the When a file is created (properties only) SharePoint Online trigger. Fill out the URL for the site collection and select the relevant SharePoint Site Address, Library Name, and Folder from the dropdown menu.
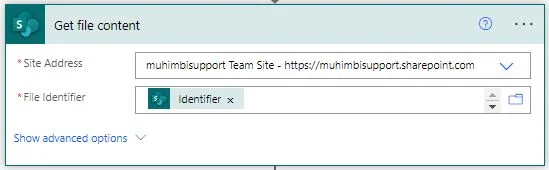
Insert MS SharePoint’s Get file content action and fill it out as shown in the image below. Substitute the Site Address with a suitable value and File Identifier with the output value of the When a file is created (properties only) action.
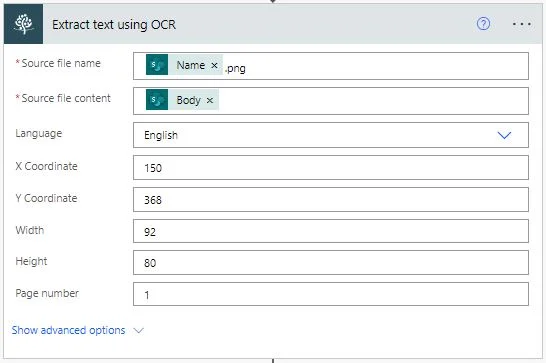
Insert Muhimbi’s Extract text using OCR action and fill it out like so:
Source file name — Name of the source file, including the extension.
Source file content — Content of the file to OCR. Select Body, which is the output value of the Get file content action.
Language — Select the language of the OCR file. This example selects English.
X Coordinate — Select the X Coordinate (in pts, 1/72 of an inch) to be OCR’ed. This example uses 150.
Y Coordinate — Select the Y Coordinate (in pts, 1/72 of an inch) to be OCR’ed. This example uses 368.
Width — Select the width (in pts, 1/72 of an inch) to be OCR’ed. This example uses 92.
Height — Select the height (in pts, 1/72 of an inch) to be OCR’ed. This example uses 80.
Page number — Page number to be OCR’ed. Leave this blank to OCR all pages, or for images.
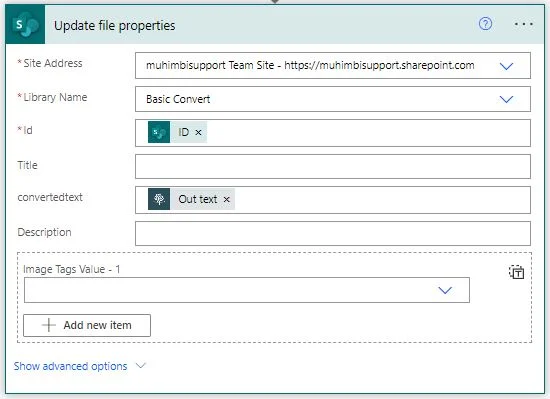
Insert an MS SharePoint Update file properties action and fill it out as shown below. This will update the OCR’ed text back to the column in the library for the item specified by the item ID.
Site Address — Select the site address of the MS SharePoint library to which the OCR’ed content needs to be added.
Library Name — Select the MS SharePoint library to which the OCR’ed content needs to be added.
Id — This is the unique identifier of the item to be updated. In this example, select Id, which is the output of the When a file is created (properties only) action.
Item — This is the column name of the library to which data has to be updated. In this example, convertedtext is the name of the column, and it’s updated with Out text, which is the output of the Extract text using OCR action. You can update the value based on whatever your column is named in your scenario.
Publish the workflow and upload a
.pngfile in the specified document library. After a few seconds, the flow will trigger and the OCR’ed content will be updated to the convertedtext column in your MS SharePoint library.