


Some time ago we wrote about some new functionality in the PDF Converter for SharePoint that allows ‘real-time’ and ‘user specific’ watermarks to be added to PDF files as soon these files are opened / downloaded / copied. This has proven a real hit with our customers and one of the questions that recently came up is how to use this functionality in combination with the SharePoint 2010’s Document ID Service. (Hint, the internal field names are called _dlc_DocId, _dlc_DocIdUrl and _dlc_DocIdPersistId).
In this post we’ll show how to automatically apply a watermark containing the Document ID to PDF files and then generate a Short URL based on this Document ID. Rather than using our watermark on open facility, we’ll create a SharePoint Designer workflow that carries out the work. Once a Document ID has been created it never changes so although real-time watermarking will work, it is not necessary and a waste of valuable processing resources.
Please note that the example in this post uses both the Muhimbi PDF Converter for SharePoint and the Muhimbi URL Shortener for SharePoint. If you are only interested in URL Shortening or just in Watermarking then you can change the sample accordingly. Also in this example we are not carrying out any PDF Conversion. Examples for PDF Conversion are available on our site for SharePoint Designer as well as Nintex Workflow.
OK, let’s get all the prerequisites in place first.
Download and install the PDF Converter for SharePoint and install it as described in Chapter 2 of the included Administration Guide.
Download and install the URL Shortener for SharePoint and configure it to accept short URLs on a web application of your choice as described in the included Administration Guide.
If not already installed, download and install the free SharePoint Designer for your environment.
Make sure you have the appropriate privileges to create workflows on a site collection.
Enable and configure SharePoint 2010’s Document ID Service
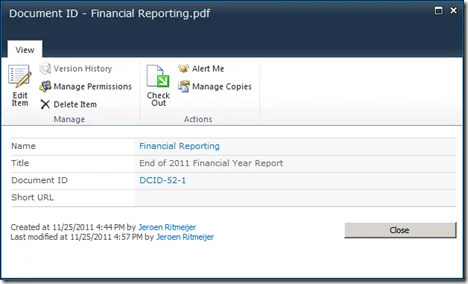
Item with Document ID Populated
With the prerequisites in place, let’s build our custom solution.
On a Document Library of your choice, modify the View to include the Document ID field. (This is just for reference, you don’t need it in the real world.)
On this same document library create a new field named Short URL of type Hyperlink. (This is just to see the name of the short URL after the workflow has executed, it is not needed in the real world).
Create a new SharePoint Designer Workflow using a method of your choice. In this example we’ll do this by navigating to the Library Tab and then selecting Settings / Workflow Settings / Create a Workflow in SharePoint Designer.
Give the workflow a sensible name, e.g. Document ID Processing and change the workflow settings to automatically start when an item is created.
Switch to Edit Workflow and insert a Create Short URL workflow Action.
Click optional short name, followed by the fx button.
From the 'lookup string' dialog, select Document ID Value from the Field from source drop down and close the dialog.
Click this ID / address, followed by the '...' button.
Enter the Document ID URL for your site, you can copy it from the Document ID of an existing item. Generally it is something like http://<path to your site collection>/_layouts/DocIdRedir.aspx?ID= .
Position the cursor after the '=', click the Add or Change Lookup button and select the Document ID Value again. Close the String Builder.
From Document / Display Form select Document.
From Overwrite / Return null select Overwrite.
When the workflow executes it will write the shortened URL to a workflow variable named this variable. The variable name can be changed, but we accept the default.
Insert a set field in current item workflow action, select Short URL as the field.
Click value, followed by the fx button. From the Data Source select Workflow Variables and Parameters and from Field from source select this variable.
The URL Shortening part of the example is now ready. Publish the workflow, upload a file to your document library and after a few seconds the Short URL field will be populated. Click the Short URL to verify it works.
 This is what the final workflow will look like after the Watermarking is added as well
You can do whatever you like with this Short URL. Send it by email, tell someone on the phone, or.... embed it in a watermark, something we'll do next.
Return to the Workflow editor and add the following steps:
Position the cursor JUST ABOVE the previously added Set field action and add the If current item field matches condition.
Click field and select File Type.
In value enter pdf (lower case, no '.' prefixed) .
Position the cursor inside the condition and add the Add Text Watermark activity (other watermark types are also available).
Fill out the fields for the watermark
- this document: Set to Current Item.
- this file: Leave the default to overwrite the existing file.
- content: Add the this variable Workflow Variable to insert the previously generated URL. Other content can be added as well.
- position: Bottom Center.
- width x height: 600 x 30
That should take care of the watermarking. Publish the workflow and upload a PDF file. You should now see the Short URL being created and when the document is opened you should see the Short URL at the bottom of the document.
If you find this useful, or have any questions, then feel free to leave a comment below.
Labels: Articles, News, pdf, PDF Converter, SP2010, Watermarking, Workflow