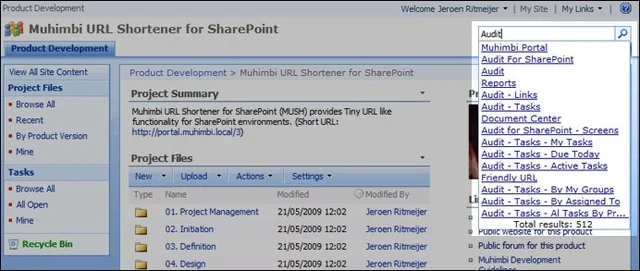
It’s only been a day since we launched our free Infuser tool and we already have an excellent application for it; Add Search as you Type support to SharePoint’s standard search box.
As many of you will be aware, Jan Tielens created a proof of concept some time ago to demonstrate how you could add this functionality to a custom web part. Very innovative, but unfortunately it has a couple of problems, most notably:
- The script has to be added manually to every page on the site, which is very laborious and not always possible.
- It doesn’t integrate with the standard MOSS search box, leaving the end user with two search boxes to choose from.
- If the user doesn’t have access to the root site of the portal then search doesn’t work.
- Resizing the window with the search results causes undesired effects.
- The search button is present, but doesn’t work.
- It is not clear how to make the search results window disappear.
- It relies on the MOSS Search web service and doesn’t work with WSS.
Although Jan’s script works without modification in Infuser, we asked Jan’s permission and spent a couple of hours to address the points listed above with the exception of WSS compatibility, feel free to add this yourself. The full source code is listed at the end of this article.
Follow the steps outlined below to add Search as you Type to your site collection:
Download and install Muhimbi’s SharePoint Infuser on one of your Web Front End Servers.
Ensure you have Designer privileges, more specifically the Add and Customize Pages right.
From the Site Actions / Site Settings screen, select Infuse custom content in the Look and Feel column.
Download the code and paste it into the Infuser window. If copying from the window below and you are using IE then you may want to paste it in WordPad first , otherwise all line breaks are stripped out.
Click the Save button and navigate to any page that contains a search box and start typing.


